🎬 Kodi Media Center 📺
The ultimate open-source media center — free, customizable, and runs on everything.
🏛️ What is Kodi?
Kodi (formerly XBMC) is a free and open-source media player and entertainment hub developed by the XBMC Foundation. It organizes and plays your entire media library — videos, music, photos, games, and live TV — from local storage, network shares, or the internet. With thousands of community add-ons, customizable skins, and support for almost every platform, Kodi is the Swiss Army knife of media center software.
🌐 Official site: kodi.tv | 💻 Source: github.com/xbmc/xbmc | 🏛️ Foundation: XBMC Foundation
✨ Features
- 🎬 Media Center — Play videos, music, photos, and games from local storage, network shares, or the internet.
- 🧩 Add-ons — Thousands of community add-ons for streaming, subtitles, weather, skins, and more.
- 📺 Live TV & PVR/DVR — Watch and record live TV with a tuner or IPTV source.
- 🎨 Customizable — Hundreds of skins, themes, and interface layouts.
- 📱 Remote Control — Control Kodi from your phone via official remote apps (Kore for Android).
- 🌐 Multi-platform — Runs on Android TV, Fire OS, Windows, macOS, Linux, iOS, and Raspberry Pi.
- 🔓 Open Source — Fully free and open-source (GPLv2) — no tracking, no ads, no subscriptions.
🟢 Install Kodi on NVIDIA Shield TV Pro
Kodi is available directly from the Google Play Store on the NVIDIA Shield — this is the easiest method and requires no special setup.
Requirements: An NVIDIA SHIELD or NVIDIA SHIELD PRO with the latest firmware update.
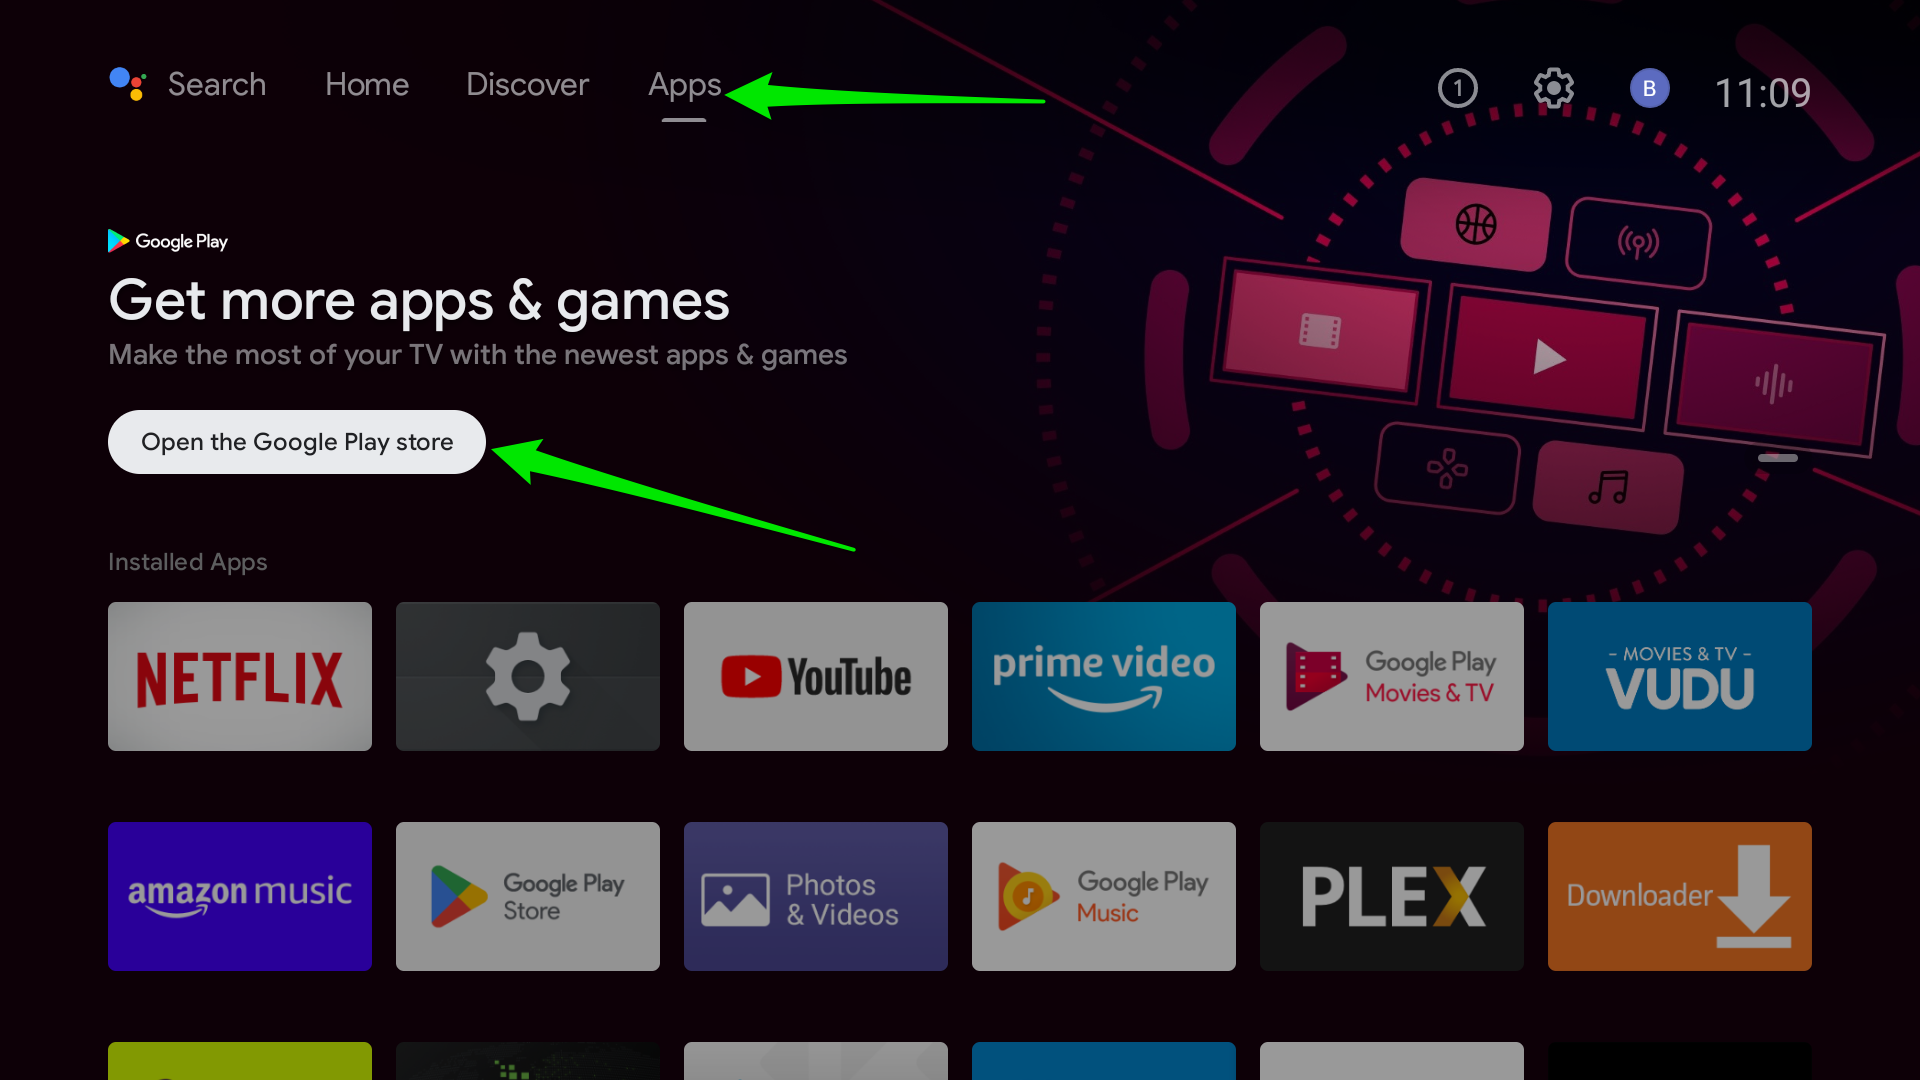
From your NVIDIA SHIELD home screen, navigate to the top menu and select the Google Play Store app (shopping bag icon).
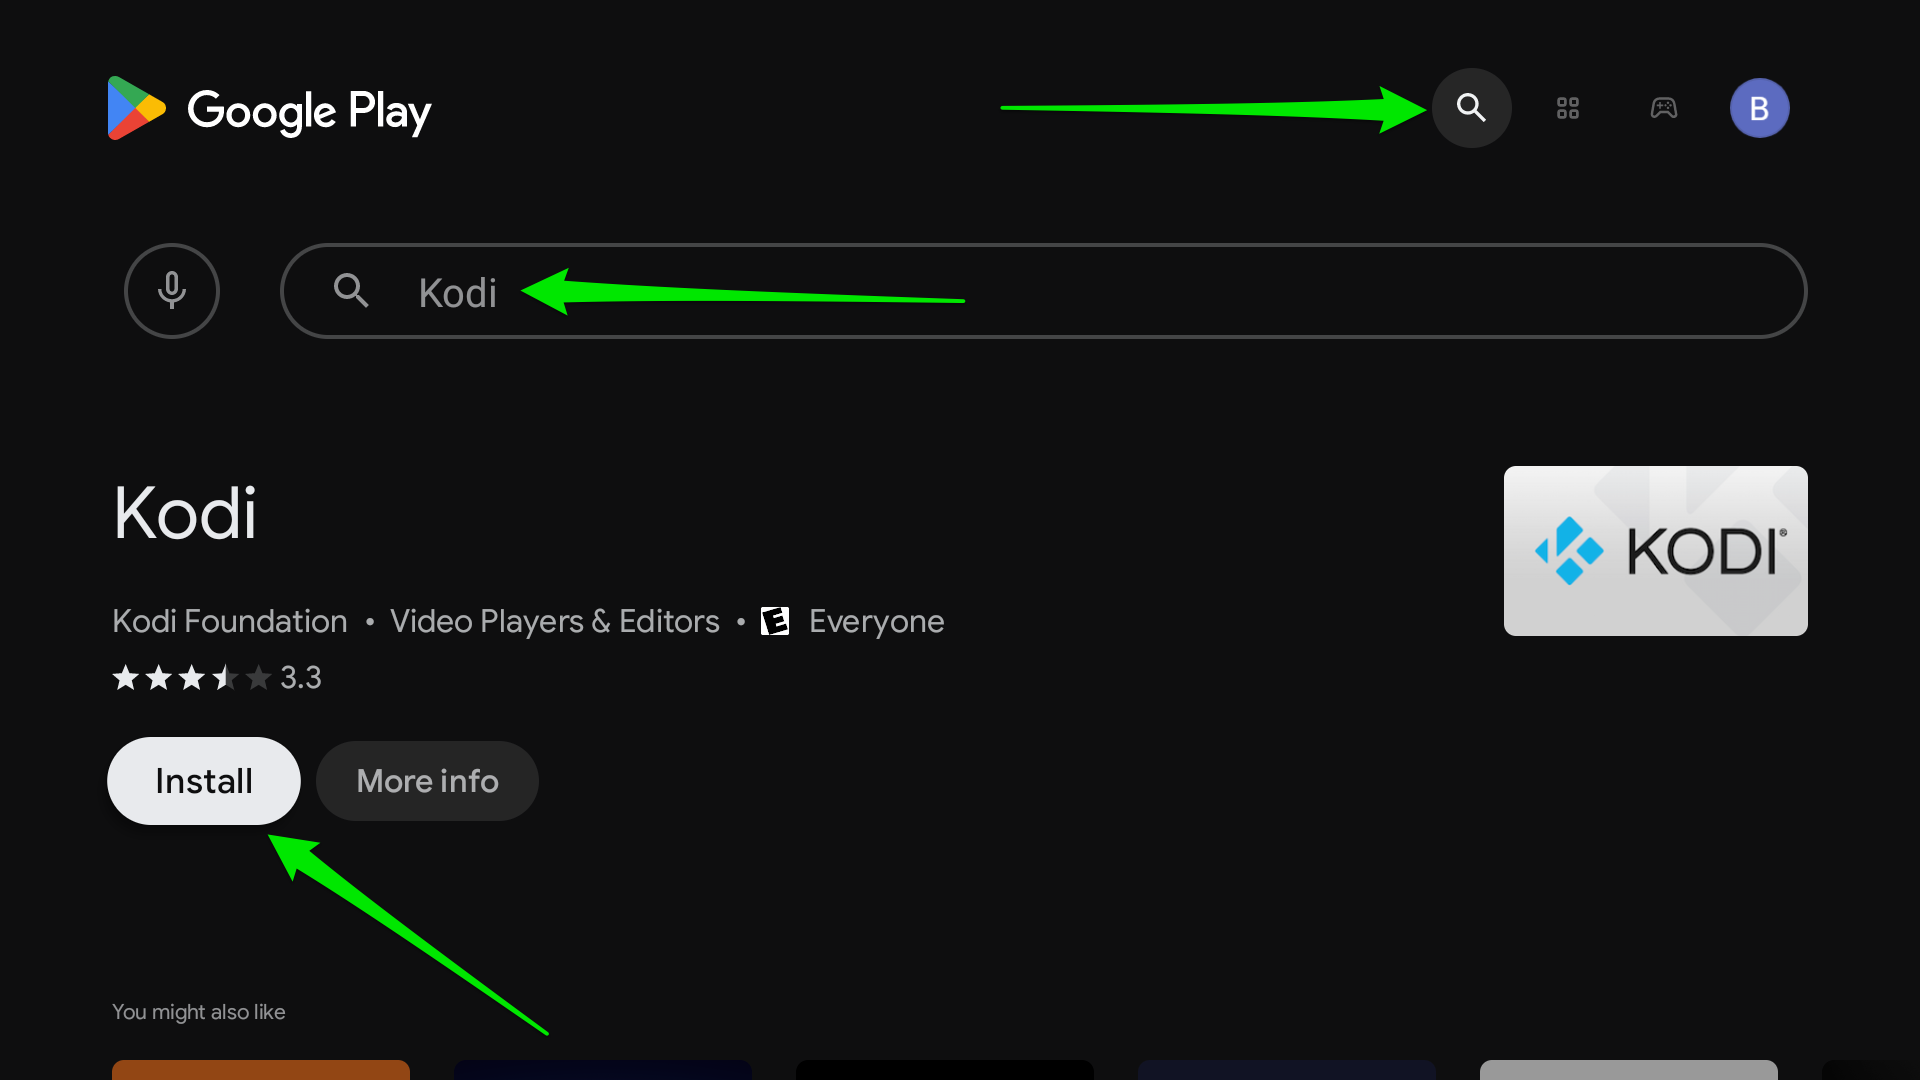
Select the magnifying glass in the top-right corner and type "Kodi" in the search box. The official Kodi entry by the XBMC Foundation will appear in the results.
Select the Kodi entry and click the "Install" button (green). The app will download and install automatically — no sideloading or special permissions needed since it's distributed through the official Play Store.
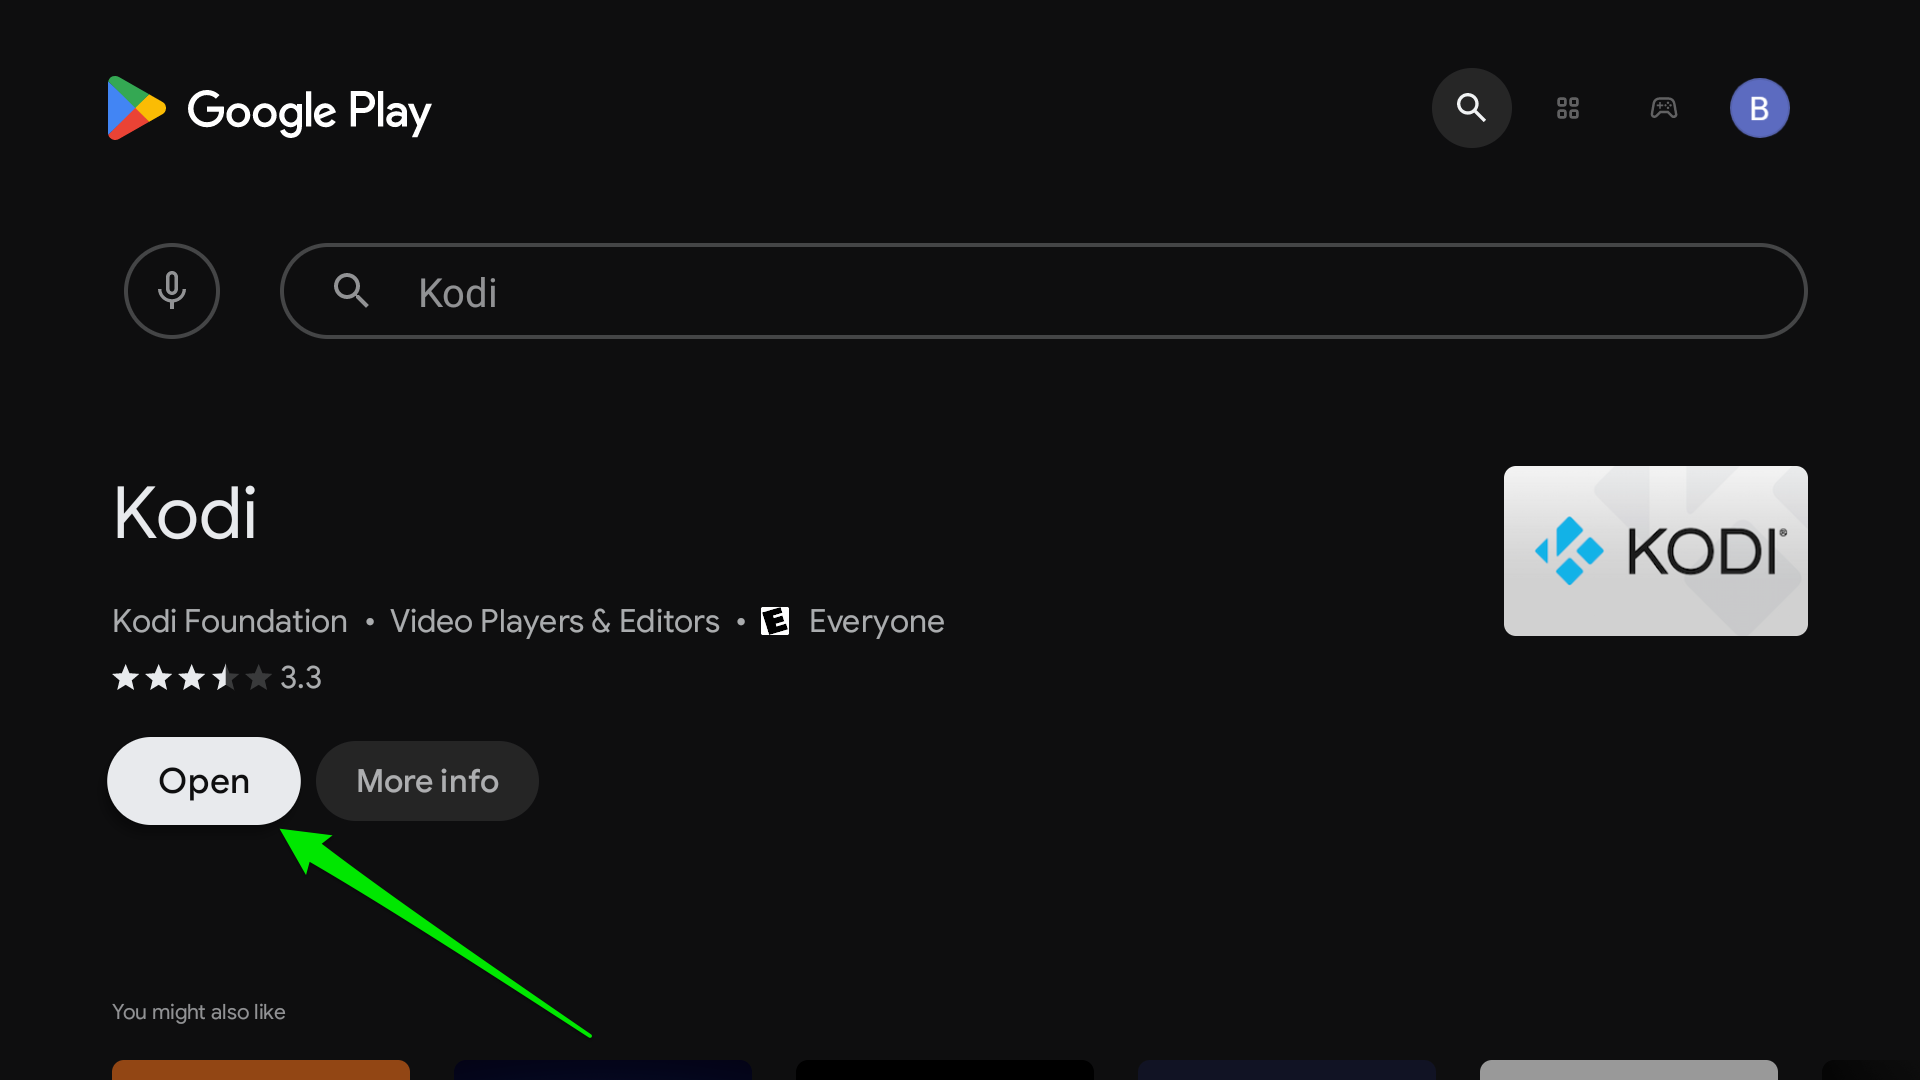
After installation completes, select "Open" to launch Kodi for the first time.
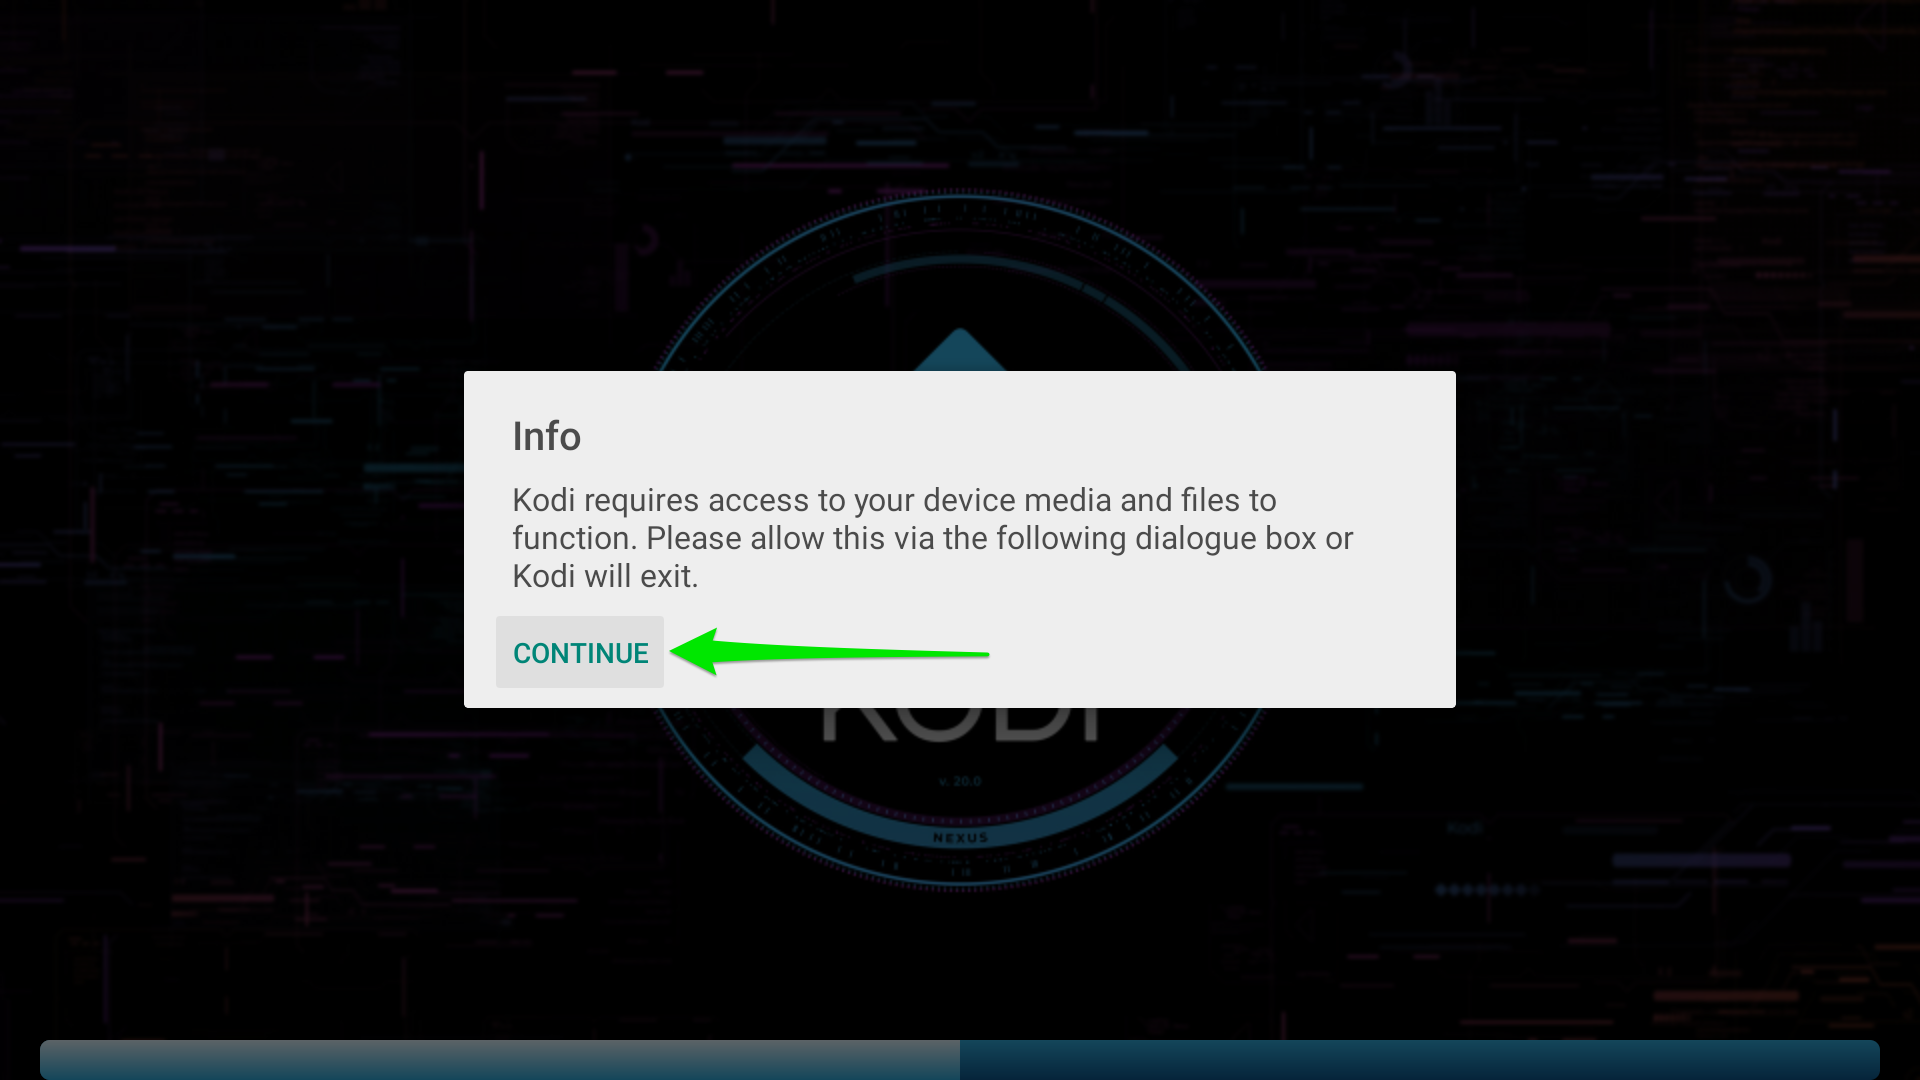
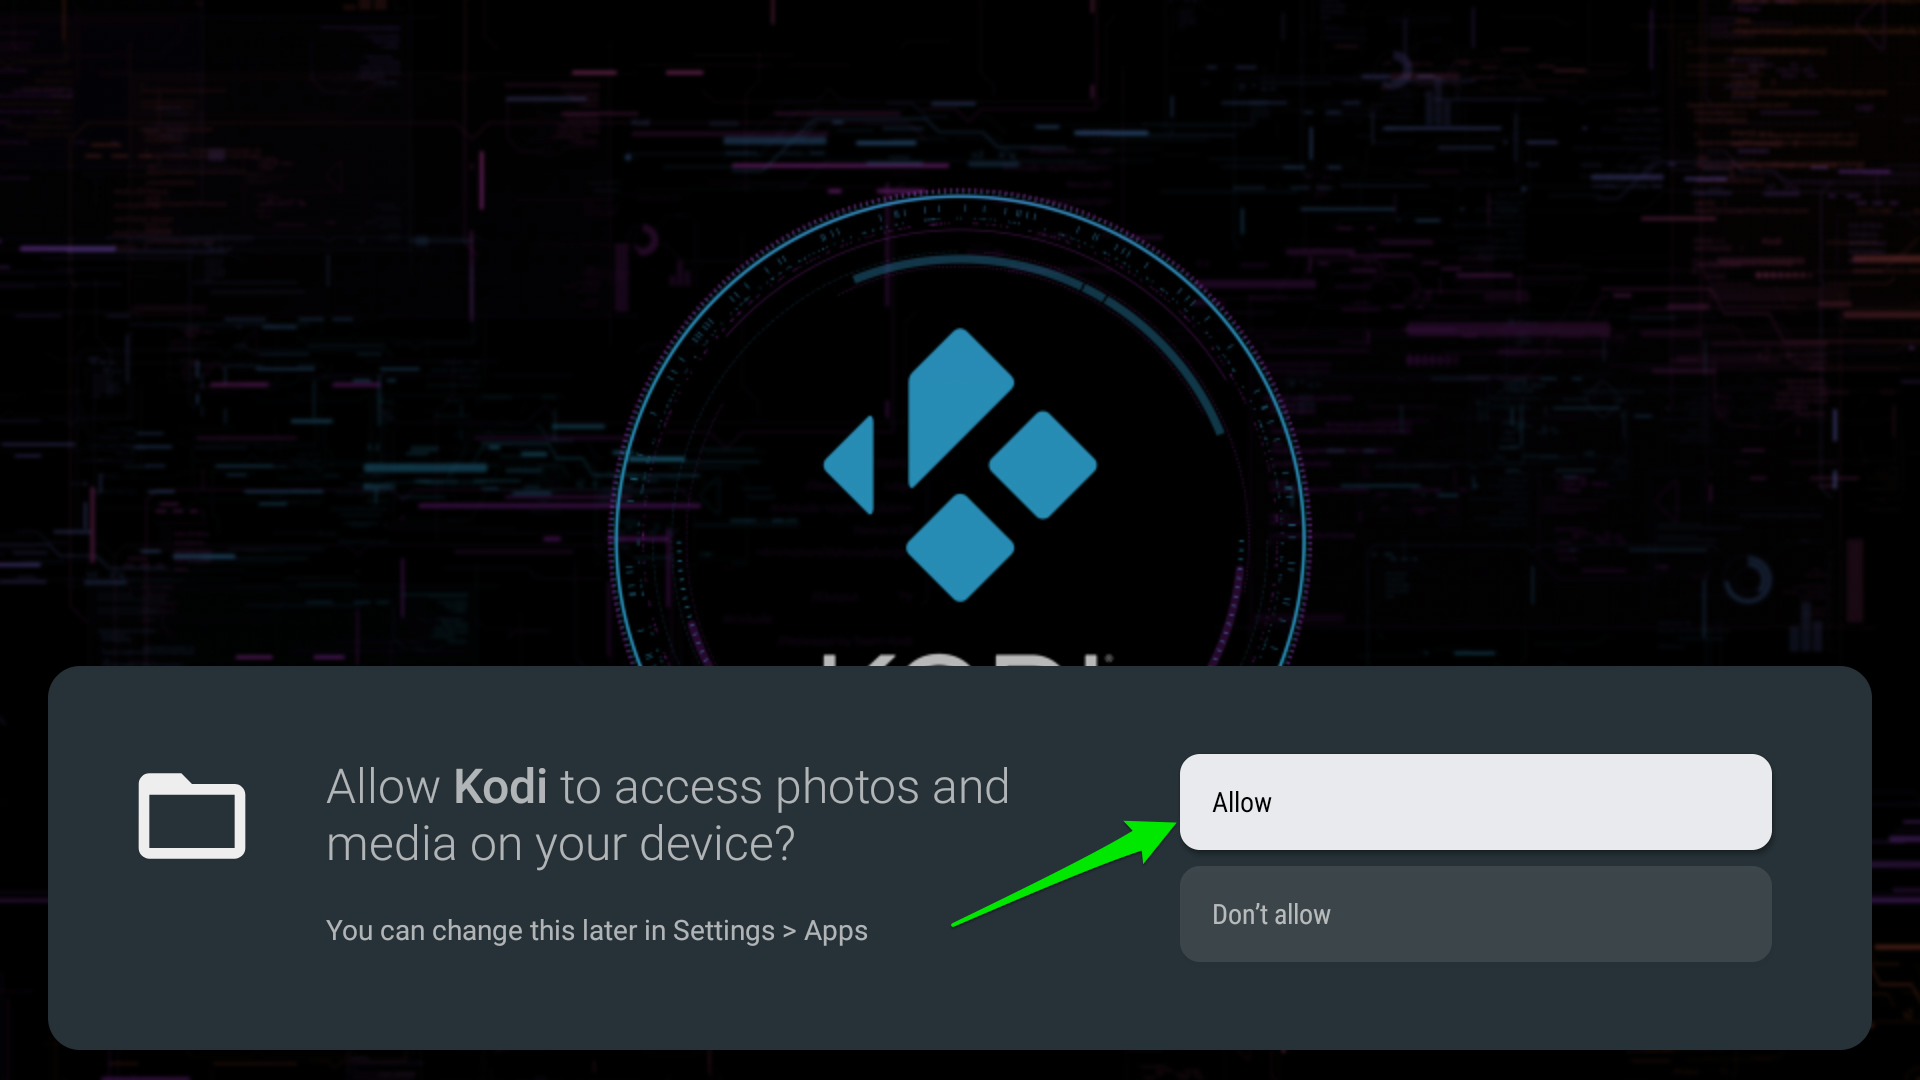
When prompted, select "Allow" to let Kodi access photos, media, and files on your device. Kodi needs this permission to read local media, manage thumbnails, and store configuration files.
Select "Allow" for Kodi to access your photos and media. This enables library scanning and artwork management.
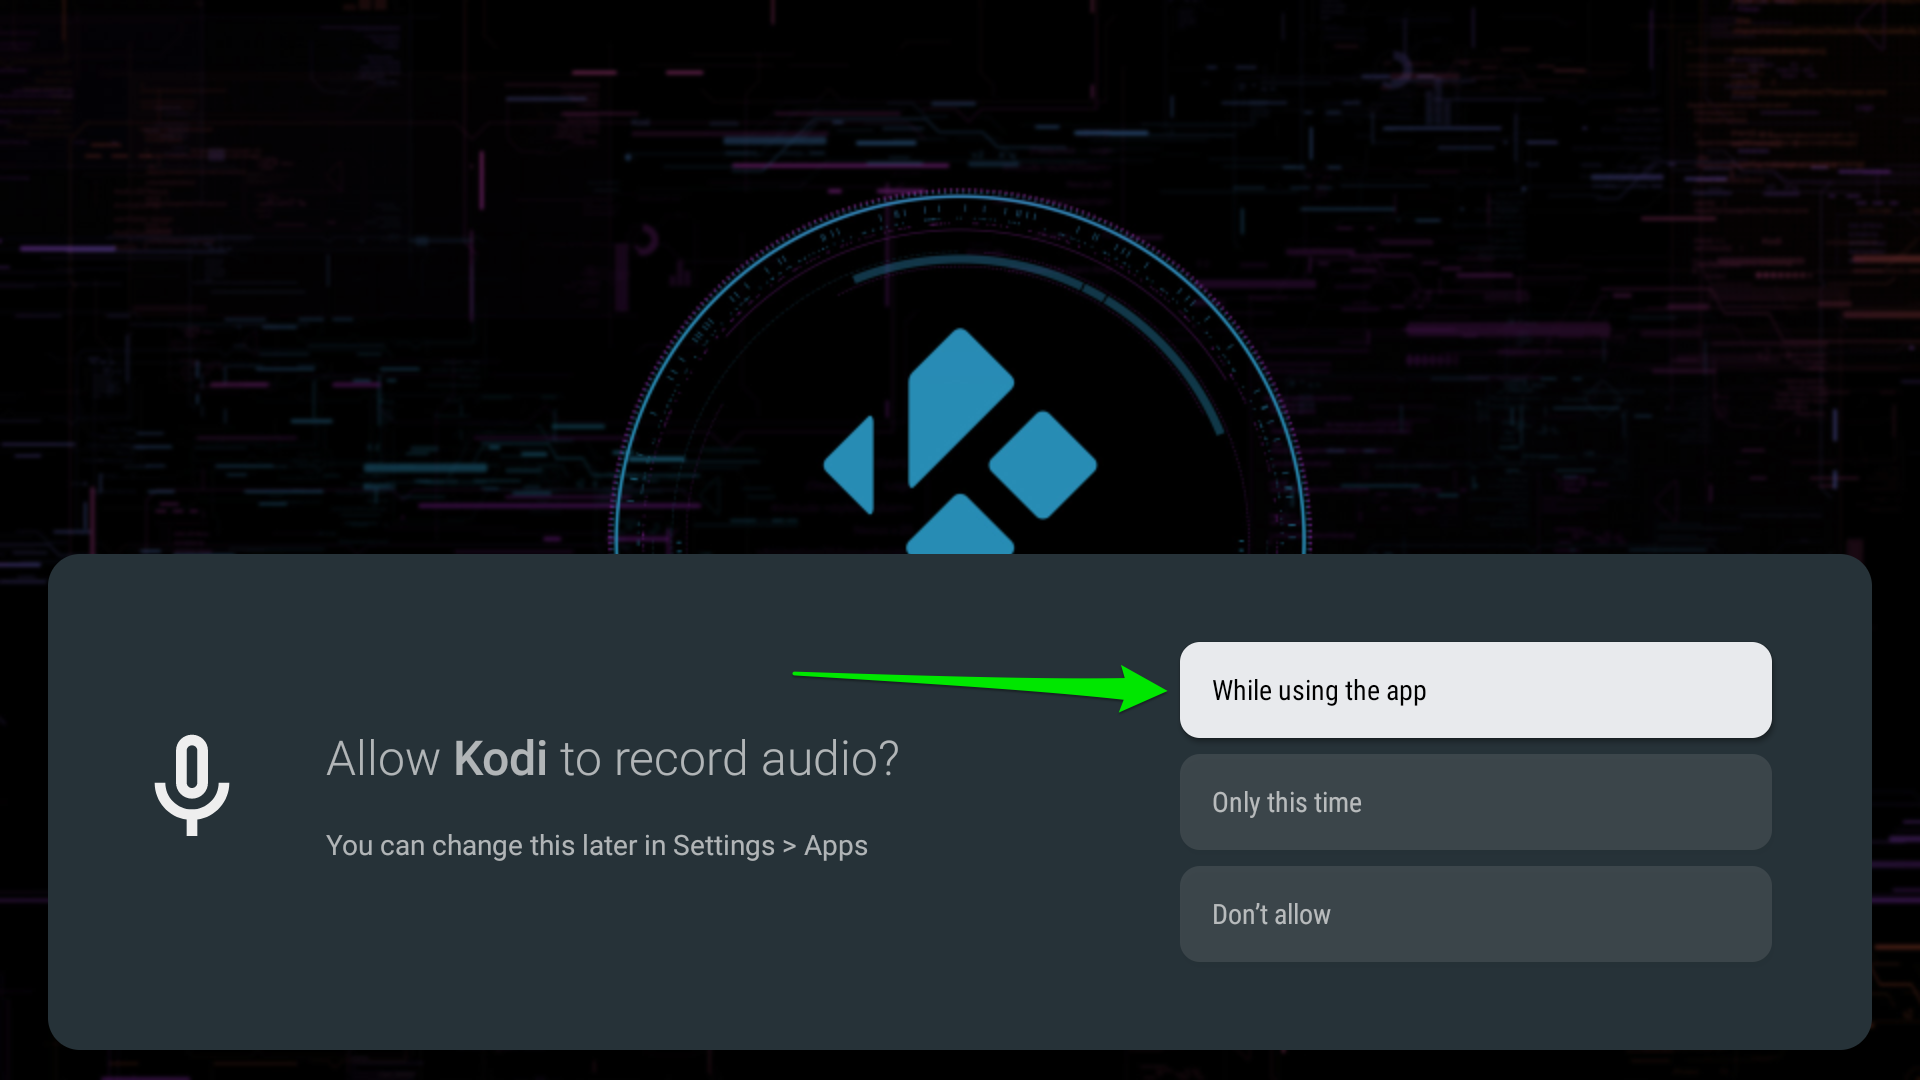
Select "Allow" to let Kodi record audio for voice command interactions (optional — you can decline if you don't use voice).
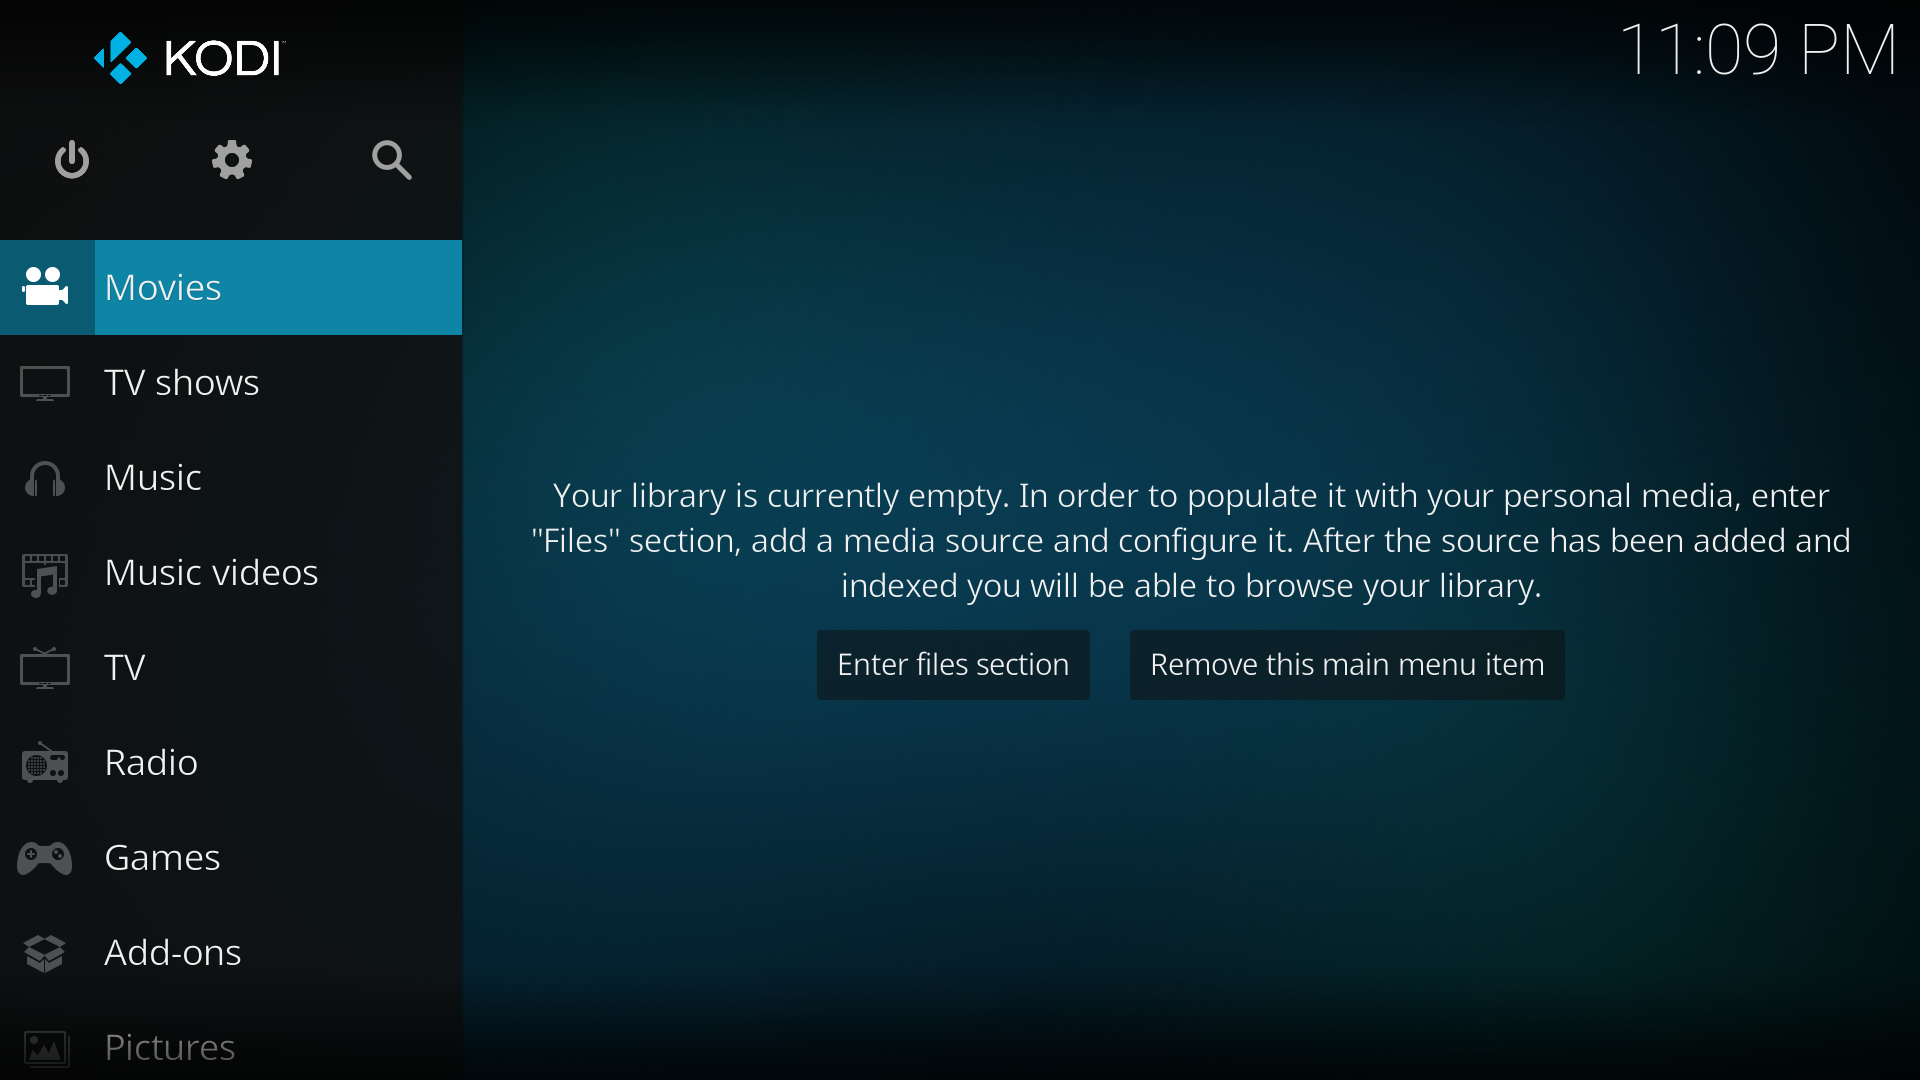
Once the setup is complete, you will see the Kodi home screen. You're ready to configure add-ons, scan media, and start streaming.
🟢 Shield Notes
✅ Kodi is available DIRECTLY in the Google Play Store — no sideloading required.
✅ The Play Store version is the official Kodi release by the XBMC Foundation.
✅ The NVIDIA Shield TV Pro has 2× USB 3.0 ports and a microSD slot for external media storage — Kodi can scan these directly.
💡 For faster navigation, use the "AI upscaling" feature on the Shield to improve lower-resolution Kodi content on 4K displays.
⚠️ Keep Kodi updated through the Google Play Store for automatic updates (no manual sideloading needed).
🔥 Install Kodi on Amazon FireStick 4K / Fire TV
Kodi is NOT available in the Amazon Appstore, so you need to sideload it using the Downloader app. This method works on FireStick 4K, FireStick 4K Max, Fire TV Cube, and all Fire TV devices.
Requirements: A FireStick or Fire TV device with Wi-Fi, at least 500 MB free storage, and the latest Fire OS updates installed.
From the FireStick home screen, go to Settings → My Fire TV → About. Highlight your device name (e.g., "Fire TV Stick 4K Max") and press the Select button (center of the remote) 7 times in a row. You will see "You are now a developer!" Confirm the message appears.
Go back to Settings → My Fire TV → Developer Options. Select "Install Unknown Apps" or "Apps from Unknown Sources" and change it to ON. On newer Fire OS versions, this is a per-app setting — you can grant permission specifically to the Downloader app later.
Go back to the FireStick home screen and select the Search icon (magnifying glass). Type "Downloader" and select the official Downloader app by AFTVNews from the results (orange icon with a white down-arrow). Click "Download" or "Get" to install it.
Launch Downloader. On first run, it may ask for permission to access files and media on your device. Select "Allow." If prompted, also go to Settings → My Fire TV → Developer Options → Install Unknown Apps and ensure Downloader is toggled ON.
In the Downloader app, place your cursor in the URL box and click the OK button to open the keyboard. Enter the official Kodi download address: https://kodi.tv/download and click Go.
When the Kodi download page loads, select "Android" as the platform. For most FireStick models, choose the ARMV7A 32-bit build (this is the safest choice for broad compatibility). If you have a newer 64-bit device and know it supports 64-bit apps, you may choose the 64-bit version.
Wait for the APK file to finish downloading. Once complete, the installer screen will appear — select "Install." If Fire OS asks for permission again, allow Downloader to install unknown apps, then return to the installation screen.
After installation finishes, select "Open" or "Done." If Downloader offers to delete the APK file, choose "Delete" then confirm again — this frees up storage space. Launch Kodi from your app library on the home screen.
When Kodi opens for the first time, it may ask for permission to access photos, media, and files on your device. Choose "Allow." Wait for the first launch to finish — Kodi may take a little longer while it creates folders and prepares default settings.
Once the Kodi home screen appears, you can: check the interface language under Settings → Interface; confirm display resolution and calibration; configure audio output for your soundbar or AV receiver; and add your own media sources under Videos → Files. For quicker access later, move Kodi to the front of your FireStick apps row by highlighting the Kodi icon, pressing the menu button, then selecting "Move."
🔥 FireStick Notes
🔥 Kodi is NOT available in the Amazon Appstore — you MUST sideload it via the Downloader method above.
💡 Use the ARMV7A 32-bit Android APK for best compatibility on FireStick devices.
⚠️ Keep at least 500 MB of free storage before installing Kodi — FireSticks have limited space.
💣 Avoid "fully loaded" Kodi builds, modified APKs, or files from random file-sharing links. Only download from kodi.tv.
🔄 Kodi installed via sideload does NOT auto-update — you must manually download and install newer APKs when released.
⚠️ Troubleshooting
"Install button is greyed out" — Wait a few seconds for Fire OS to scan the APK. If it stays greyed, delete the APK in Downloader, restart the FireStick, and download again.
"App not installed" — Free up at least 500 MB of storage. Go to Settings → Applications → Manage Installed Applications and remove unused apps. Use the ARMV7A 32-bit APK.
"Kodi opens to a black screen" — Restart the device from Settings → My Fire TV → Restart. If it continues, clear Kodi's cache from Manage Installed Applications.
"Developer Options is missing" — Go to Settings → My Fire TV → About → highlight your device name → press Select button 7 times to unlock.
General Shield issue? — Since Kodi is installed via Google Play Store, it updates automatically. If it crashes, try clearing cache from Settings → Apps → Kodi → Clear Cache.
📦 What is Kodi?
Kodi is a media center application that plays nearly any media format you throw at it. It supports local files, network shares (SMB/NFS/UPnP), streaming protocols, IPTV, live TV with PVR backends, game emulators, and an enormous ecosystem of add-ons for everything from weather forecasts to subtitle downloads. Everything is controlled with a standard remote — no mouse or keyboard needed on TV devices.
🔗 Official download: https://kodi.tv/download
🧩 Plugins & Add-ons
Kodi's power comes from its add-ons. Check out the Plugins section for install guides — starting with POV, a top-tier movie & TV add-on.
☁️ Debrid & Cloud Services
Debrid services make Kodi add-ons actually work. Check out the Services section to compare options — starting with Premiumize, the all-in-one cloud + VPN + Debrid suite.
🖼️ Reference Screenshots
Copied locally from the referenced source article: IPVanish Kodi install screenshots. These are stored in the repo so the guide does not depend on remote images disappearing.
🔗 Sources
→ Installing Kodi on the NVIDIA SHIELD and NVIDIA SHIELD PRO — IPVanish Support (support.ipvanish.com)
→ How to Install Kodi on Amazon Fire Stick and Fire TV — TechBloat (techbloat.com)
→ HOW-TO:Install Kodi on Fire TV — Official Kodi Wiki (kodi.wiki)